Showing posts with label studio. Show all posts

Saturday, October 29, 2011

In the Studio... packing for a trip

New Hampshire are you ready?
Here I come!

Things get kind of crazy when I'm getting ready to teach. For every class there is a day (at least) of ordering, shipping, gathering, and packing supplies, printing hand-outs, figuring out inventory, and hoping against all hope that even though I've checked my lists ten times I'm not forgetting anything.

Monday, January 31, 2011

The Sketchbook Challenge: Highly Prized


I've been thinking about the Sketchbook Challenge theme all month.
It only took a few minutes to know what I consider to be very valuable.
TIME

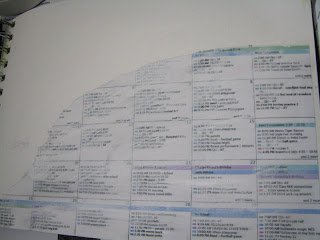
The first bit glued into my sketchbook? My usual schedule. It looks like that through next June. Five kids and a part time career will do that to you. Time is flying by and I often feel I'm missing it. My oldest daughter just applied for college. I'm feeling a little ... something. Excited? Yes. Apprehensive? Just a tiny bit - she's prepared. Bushwhacked? When did she grow up!?!

I've thought of images I wanted to incorporate. I've thought of amazing and wonderful outcomes.

I've also avoided actually doing anything until the last possible moment. It's a fear thing. Yup - me. The lady who preaches non-stop that "it's all about DOING the work and we can't let fear get in the way." Here I am in front of everybody - thinking everybody is expecting some fantastic outcome and feeling inadequate.

So. TIME for me to take my own words to heart and just DO it. Forget about expectations. 

1- The calendar gets glued in. Painted over with a bit of gesso. Oops. Now I remember that ink-jet prints smear when wet. Ah well, so be it. Find a couple of my favorite pics.

2- Let the gesso layer dry then paint a little bit of a color wash over that. I'm using Prochemical's Profab Textile Paints - because I have a LOT of them on hand. They're an acrylic and work fine.

3- Play around with photoshop and a few of the images that speak to my feelings. Print them out, cut them out, glue them in. I used a PVA glue this time. I think I might like gel medium better. We'll see.

4- Add a little more of a blue wash over the hands to blend it into the background.

5- More acrylic in a transparent blue and an opaque white - swirls in with a brush - like time swirling all around me and away.

6- Hunt through my stack of screen for the perfect image. Ah - there it is. This time I used it like a stencil, first with the white opaque paint, then a navy transparent. It was a pain having the wire binding loops right in the way. I'm seriously thinking of working with loose sheets then binding them as shown in Jane Davie's  tutorial. When I find some time.

I am addicted to thermofax screen printing. I have a machine and run a service, making ready made or custom screens. It allows me to feed my insatiable hunger for making new images in my own work. This particular screen came from a photo sent by Alexandria (one of my on-line students from QuiltUniversity.com) of one of her antique pocketwatches.  
This is what my work surface looks like when I've got projects going on. Stuff left from the last class I taught. Samples shoved out of the way. Kids forms for school events to be filled out. The usual. No - I'm not an artist who thinks clutter is great - it drives me nuts. I work best when I can clean everything up and start fresh with room to work and breath. No TIME for cleaning up right now.

8- Last step - I started in with pencil, moved up to a Sukura Pigma Pen and then decided a sharpie would glide over the bumpy acrylics on the page. 

My baby has wings. She's ready to fly.

I'd love your feedback.
Do you have any ideas that could help me?
I want to learn how to savor each moment, live in the present. I still have to keep most of my schedule - I'm already very good at saying no to more stuff. The things I do I love. But time still flies away.

Oh, and don't forget to head over to  the Sketchbook Challenge today to see who won this months giveaways. February's theme will go up tomorrow. Can't wait!

Wednesday, February 24, 2010

Citrasolv Photo Transfer Tutorial


The work I do as a mother involves a lot of delayed gratification. When I escape to the studio and put on my artist's hat it can be nice to see some instant results. Solvent photocopy transfer is one of my favorites. You need only a photocopy, fabric,  Citra-Solve®, and a few seconds of elbow grease and viola!

The good people who produce this environmentally friendly cleaning product have included an ARTISTS' PAGE on their website. I'm honored to have been included among other textile artists I admire such as Jane Davila and Jane Dunnewold.

I encourage you to take a peek over there - lots of interesting things being done. It makes me think that I have some experimenting to do. Dissolving pages from National Geographic magazine? Hmmm. Wonder how I can do that on fabric.

Want to join me in a little playtime? Here are the instructions for moving the ink from a photocopy onto paper or fabric. Wear gloves and work in a well ventilated area. The stuff is much more pleasant than the paint stripper I used to use but it IS still a solvent.


Materials:


  • Citra-Solve®  (find where to buy it here)
  • Cotton ball
  • Metal spoon
  • Non-porous smooth surface
  • Masking tape
  • Fabric or paper of your choice
  • Photocopy


Directions:
1. Find a copyright free black and white image. I love to use vintage family photos.
2. Make a photocopy of the photo, sizing it no larger than 5" x 7".
3. Cut away the background if it detracts from or competes with your image.
4. Draw in any lines that need emphasis or add in some fun scribbles. Maybe Grandma always wanted a tiara or your puppy looks great in polka dots! You can digitally manipulate the photo as well.
5. Make a final photocopy. (Note: Inkjet prints DO NOT work with this method.)
6. Tightly tape a piece of fabric or paper to your glass or non-porous surface.
7. Tape the photocopy face-down on your paper or fabric. Don't let the tape cover the image.
8. Dampen the cotton with Citra-Solve® and squeeze it out. Rub it on the paper until you see the ink show through. It should be barely damp - too juicy and your image will bleed and blur.
9. With the back of the metal spoon, rub, rub, rub hard and like crazy in all directions. You are moving the ink from the paper to the fabric.
10. Pick up one corner of the paper and peek. Look for spots that haven't transferred yet then put the paper back down and rub some more in that spot.
11. Toss the paper in the trash and let the solvent evaporate.
12. Feel free to play around with the image. Color it in with colored pencils, ink, paint or whatever you have on hand. Be creative! Have fun!


The only tricky part is finding a photocopier that works. If you are using Citra-Solve® (the other orange solvents I've tried have not worked) and you are rubbing and nothing is happening it is most likely the copy that is at fault. I test any copy I make right at the copy center. Dampen a cotton ball with the Citra-Solve® and stick it in a little zip-loc bag in your pocket. Make one photocopy then place it face down on another piece of paper on the counter, dampen with the Citra-Solve® then rub it a bit with the scissor handles on the counter, the back of your thumbnail, whatever you have there. If it's going to work it will work right away. If not, no amount of rubbing will work. Find another copy center. Don't leave the bag in your pocket too long. The solvent will eventually dissolve through the bag although it won't really hurt your clothes. (Ask me how I know!)

If you'd like to see it instead of just read about it I demonstrate the technique along with a lot of other fun techniques in the Quilting Arts DVD Workshop "Surface Design Sampler Platter."

Here is a link to the first of several Tutorials on how to Photoshop your images.

Tuesday, December 2, 2008

Digging Out

Today I made my first inroads into the deadline induced mound of chaos that is my studio. Clearing a path to think creatively and with something of an organized mind is an absolute necessity for me. Oh - that and the fact that I can't walk two feet or reach any of my supplies for the piles on the floor. I've been racing to meet one deadline after another and things just (literally) piled up.


After clearing one corner I took a break to sew up some Christmas Bags. Every year I buy a yard or two of a Christmas fabric on clearance and make a few gift-wrap bags of different sizes. Sometimes I get fancy and include drawstrings and linings. This year I just whipped a few rectangles together with serged edges and tied it with a ribbon. I've always disliked gift-wrap. Not really. Actually - I think a beautifully wrapped gift is too beautiful. All that time and expense on something that will be ripped apart and thrown away. These bags are kept year to year or given away. Believe it or not they end up being much cheaper, even initially, than wrapping paper. If I wanted to they could be as elaborate and beautiful as any paper wrapped gift.


And this for Catherine in New Zealand. The view out my studio window. Blue skies, colorful autumn leaves, green pines. Here in NC there are trees grow like weeds everywhere that you don't mow or pave. Most lawns stay green year round. I love it here weather-wise. Mostly. Talk to me again in August about humidity. I think I'm definitely a cold weather girl. I love my woolen sweaters and socks.

Friday, April 11, 2008

Great Design

I love it when I come across something that is not only great to look at but ingeniously engineered. At first there was nothing too exciting about my most recent studio addition from IKEA other than it's color. Oh, and the fact that if a sneaky little four year old managed to get into my paints and spill them inside the drawer I could wash it out. Can't do that with wooden drawers full of thread. Ask me how I know.
 
As I assembled the cabinet I fell in love with its' elegant design. I love putting things together! A very creative soul figured out a way to put a full sized Taboret....

.... into this skinny little 3" box. Anyone else out there concerned about the way we ship most everything we buy back and forth around the world? Fossil fuels, pollution, human rights, all that. Think of how many skinny little boxes will fit into the same space as one fully assembled cabinet. Maybe sometime I'll riff on my hopes for the future of clean energy sources. Another day.

Back to the cabinet. This clever designer made it simple enough for any novice to assemble with nothing more than a screwdriver. This is a drawer. Really. Fold on the dotted line, slide this piece in here,  fold the little hook there, and viola! You have a drawer! Elegant design in a simple object.

The gorgeous vase by the way, was a gift from my mom. Every time my parents come to visit they take a little trip to Seagrove, NC - home of too many talented potters to count.