Showing posts with label tutorial tsunami. Show all posts

Thursday, October 21, 2010

Art Spark Tutorial Tsunami (part 3)

Couldn't resist including a few more sweet Halloween tutorials.
And guess what - my Halloween playlist is waaaay cool now. (I'll list it in a minute.)

Jane LaFazio
Papier Mache Skulls

Alisa Burke
Pretty Painted Pumpkins
AlisaBurke.Blogspot.com


OK. Here is what has been added to the playlist I told you about here.
Bach's "Toccata and Fugue in D Minor"
Nightmare Before Christmas "This is Halloween" and "Oogie Boogie's Song"
Humpback whales singing (the real thing)
The theme from "The Adams Family"
Wagner "Ride of the Valkyries"
Theme song from "Ghostbusters"
Sha Na Na "Witch Doctor"
Micheal Jackson "Thriller"
Theme song from "Dr. Who"
From Harry Potter "It's Halloween" "Double Trouble"
Star Wars Episode V "The Imperial March"
The Sorcerer's Apprentice""
"Dance Macabre"

Friday, October 15, 2010

Art Spark Tutorial Tsunami (part 1)

Same fabulous tutorials have been posted by members of ArtSpark!

Jane LaFazio
Layered Journal Page


Melanie Testa
Fun Foam Stamps

Part 2 comes tomorrow so check back soon!a

Wednesday, June 16, 2010

Tutorial: Painting Shoes

Welcome to the Shoe Tute
Part of Art Spark's Tutorial Tsunami!


Question?


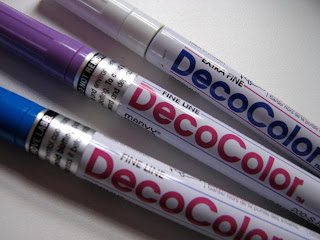
What can a person do with some acrylic paints, brushes, some nifty new paint markers, and a favorite pair of old but comfy shoes?

Answer!
 Get some STYLE my friend!


Ready? Find a pair of shoes, preferably leather. My favorite comfy shoes were my first try - they couldn't look any worse so there was nothing to lose eh? My next pair were a great pair of  NAOT's (one of the very few brands that fit me.) I think these were as cheap as they were on Ebay because they were kind of an ugly color. Maybe you'll have the same luck as I did there.


You'll need: shoes, fingernail polish remover, gesso, acrylic paint, spray sealer. Optional - sharpie, paint markers.


Take the shoes and clean them up as much as you can then rub a little nail polish remover all over them . It roughs them up and removes any finishes so the paint will stick to the leather.


Prime the shoes with a layer of gesso then let them dry.


Chose one or several base paint colors and block them in. That just means put the colors where you want them. I used textile paint because those happened to be the paints I have on hand. I did choose opaque paints rather than transparent in order to get better coverage. 


I like using the paint markers next to doodle in some shapes. You could also choose to start out with the sharpie and doodle designs onto your color blocks. On the blue shoes I painted blue first, purple next, used the sharpies, then filled in spots with the paint markers. For the red shoes, I knew I wanted them to be RED, RED, RED so I kept it monochromatic. I was so excited about the paint markers that I played with those first then filled in around them with the sharpies.


Loved what was happening here so I kept going and doodled more with the sharpie. Uh... didn't like it much. Hey - not a problem! Now I know what I want. Paint back over it and decide that for this particular shoe, less is enough!


Take the shoe outside, stuff the inside with newspaper, tape off the soles if you'd like to then spray a thin coat of sealer to protect the paint.Wait patiently for the stuff to dry then wear with STYLE!


Now don't forget that Alisa Burke also has a tutorial today. An adorable altered tank top!


If you missed the first wave of tutorials you can check out Melanie, Diana, and Jane for their fabulous tutorials!