Welcome to part two of how to use Photoshop Elements to get your vintage photos ready to use for CitraSolv photo transfers. If you are coming in to this process here I highly recommend that you read through part one. Today we'll work on learning to isolate a figure by selecting it, and a little more about erasing and using the brightness/contrast tools.
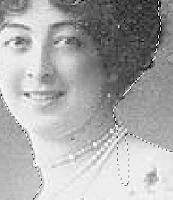
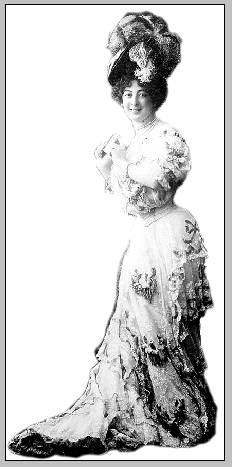
Remember the lovely Saharet? This is a copyright free image courtesy of the Library of Congress' Flickr site. In the last tutorial I mentioned that while there is great contrast here, too much black ink might bleed. Just for kicks, let's pick Saharet out of her background and use her all by herself. It's a little painstaking but nothing too difficult.
Step 1 - Select
The main tool that we are going to use is a select tool called the Magnetic Select Tool. You can find it on the bar to the right - something that sort of resembles a lasso. Select that then move up to the tool bar on the top. There is enough of a contrast along the edge of the figure that this tool will work wonderfully well. Click the lasso with the Magnet on it.
Next move over to Feather and decide how fuzzy you want your edges to be. The larger the number you choose here, the more pixels will be included in a fuzzy line around your image. I think I want the edges to be fairly sharp so I'll choose 2 pixels and a width of 2px. Anti-aliasing will make pixelated curves appear sharper so it's a good idea to leave that box checked. Edge contrast makes the dark side of your edge darker and the light edges lighter - again increasing sharpness.
 Now use your cursor to slowly go around the edges of the image. You can click as you go to spot glue the line to the more complicated edges. Remember that if your image is a little too small use the Zoom tool. Click to zoom in until you can see your edges clearly.
 If you are careful and lucky you can get all the way around your image then double click to close the loop. You should see a flashing dotted line around your image. If your loop disappears entirely click the Undo button (or use Control-Z) to hopefully bring your loop back. Sometimes my fingers get ahead of me and click one too many times and my loop disappears. Yup. The Undo button is my best friend.
 If you have a mistake here and there it's not a big problem. Take this little loop for instance. Instead of going back and redoing the entire select process, you can add in that little part to your bigger loop. Hold down the option/alt key while you use the cursor to to loop around that missing part and it will be added to your loop. You should see a little + sign next to the lasso. If you included something that you didn't want to include you hold down the shift key while you use the curser to trace the part you want to exclude. You'll see a - sign this time.
 Step 2 - Invert
Now you have a lovely flashing line around your image. Find the Select drop down and choose Inverse (shift-control-I). This will choose everything around your image. You'll see two flashy dotted lines now.
Easy now. Hit the Delete key on your keyboard. The whole background disappears. Cool huh? Now use the Crop tool (see pt. 1) to get rid of all of the extra white space. Finally, go back up to the Select drop down menu and click on Deselect to get rid of all those flashy lines. You can also click Command-D.
Now feel free to use the Brightness/Contrast tools we learned in part 1 to punch up the contrast. Keep a balance between dark and light. Or you might like the image just like it is and skip this step altogether. And there you have it. Miss Saharet all by herself and ready to be transferred.


2 comments:
Even though I know how to do this, I like that you are taking it nice and slow. I'm sure there will come a part where I say "Wait a minute - what was that?" Thanks again!
I'm catching this a year late, but finding it oh so helpful. I've forgotten so much of what you are teaching, that it's a great refresher. Thanks for taking the time to write this Tute!
Post a Comment