 I'd like to show you how to take a photograph and prepare it for a thermofax screen. Printing with these screens is one of my very favorite things to do - you can use them with cloth or paper or really - any flat surface. If you don't have access to a thermofax machine, I have a service where I can create a screen for you from your own images, as well as having a number of ready-made images for you to use.
1- Select an image. Choose something with high contrast - it's easiest if it has a plain or simple background. Either use your own photography or find something that is copyright free. Wikimedia Commons has a wonderful repository of images under Creative Commons Licenses that are available for you to use. Download the highest resolution available.
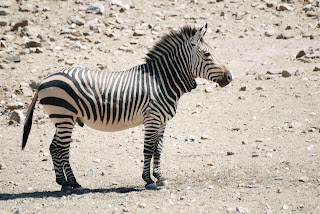 |
Harmann zebra, Hobatere Private Reserve, west of Etosha National Park Author - moongatclimber |
2 - Open your image in your favorite digital editing program.
I'm using Adobe's Photoshop Elements (PS10) but the tools I'm using are fairly standard. They might be in a different place - if you have trouble finding them type in the name of the tool in the help window on the toolbar. You can download a trial version of the PS10 and use if free of charge for 30 days.
3- Crop your image.
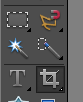
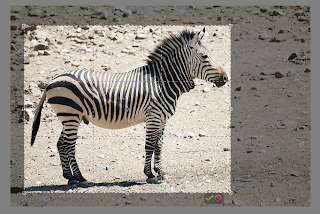 Use the CROP tool to eliminate extra background. It simply gives you less space to have to fuss with.
4- Remember that command or control Z is your best friend - it's the "undo" function and will let you back up as many steps as you need to if you don't like what you've done.
 \5- Select your subject. Use the magic wand, or some other selection tool to click and select all the way around the edge of your subject. You might need to click a lot in some areas that don't have a high contrast line - don't worry if extra space is included - you can erase that in a minute.
Sometimes when I double click I lose the selection. I just clicked too fast and the whole thing disappeared. What I do is just hit command Z again and it reappears.
6- Invert the selection. The blinky line will now be around the outside of the image and around your subject.
7- Hit Delete and the background will disappear - at least mostly.
8- Control - D deselects everything.
9- Click on the Zoom tool and zoom in so you can see the edges of your work.

You can see that there are areas that need a bit of cleaning up and areas that you might not want to draw attention to. (Sorry guy - you’re going to be gelded.)

10- Choose the eraser tool to clean up your edges. Use the slider to change the size of the pixel brush so that it comfortably fits within your picture. Keep the opacity at 100%.
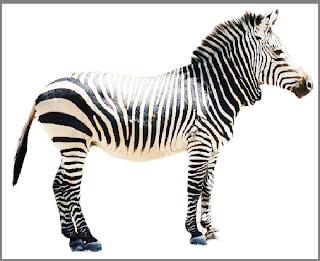 Start working your edges but try not to erase large areas all in one sweep. That way if you accidentally erase something you wanted to keep (remember “control Z!”) you won’t have to re-do large areas.
Continue to zoom in and out, moving around your image and changing the size of your brush to get into any tight areas.
11- Play with the Threshold filter found under the Filter/Adjustments menu. Sometimes it works the first time but sometimes you need to back out and fix some other things first. This is one of those times.
In this case, Mr. Stripes has lost the stripes on his back - he’s not quite ready for the “Threshold” filter yet. Simply hit “cancel” and we’ll do something else.
12- Play with the lighting. Find "Enhance/Lighting" then either "Brightness/Contrast" or "Shadows/Highlights". In this case - it is the highlights on the Zebra’s back that are being lost so I’m going to play with those for a bit and see if I can get the black and white stripes to look more even.
I’ve darkened the highlights, played with the shadows and messed with the midtone contrast until it looks like all of the stripes are closer to the same. Notice all the highly technical terms I’ve used - it’s really just messing around with things until you get something you think will work. As you gain experience you’ll be able to come quicker to the place where you can make the image work for a thermofax screen.
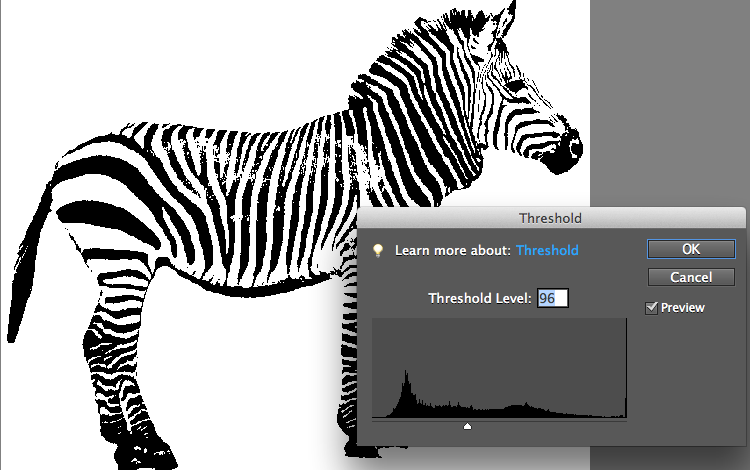
13- Try the Theshold function again. My goal was to keep his eye from disappearing but to still keep the stripes on his back. Just move the slider back and forth until you are happy with your image.
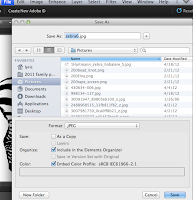
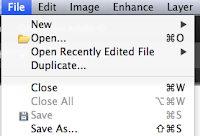 14- Save your image. In fact - it is helpful to take this step quite often during your explorations. Hit File/Save As - (NOT just the automatic save function!) and rename each picture as you go. For instance, Zebra1.jpg, Zebra1.jpg etc.
Another thing to pay attention to when that "save as" screen is up is the "options" button. (I think I might have cut it off in this picture. It's usually on the bottom right. Slide your "Image Quality" button all the way to maximum. This minimizes the compression that happens every time you save a jpg. If you don't do this the file size might be so small by the time I get it that it will be too pixelated to use.
And there you have it. A crisp black and white image - no shades of gray - ready to be turned into a thermofax screen for your printing pleasure.
Send it through your thermofax machine or send it off to your favorite thermofax service provider and get ready to play! You'll be printing in no time at all!


 I'd like to show you how to take a photograph and prepare it for a thermofax screen. Printing with these screens is one of my very favorite things to do - you can use them with cloth or paper or really - any flat surface. If you don't have access to a thermofax machine, I have a service where I can create a screen for you from your own images, as well as having a number of ready-made images for you to use.
 Use the CROP tool to eliminate extra background. It simply gives you less space to have to fuss with.


 Start working your edges but try not to erase large areas all in one sweep. That way if you accidentally erase something you wanted to keep (remember “control Z!”) you won’t have to re-do large areas.



 14- Save your image. In fact - it is helpful to take this step quite often during your explorations. Hit File/Save As - (NOT just the automatic save function!) and rename each picture as you go. For instance, Zebra1.jpg, Zebra1.jpg etc.


